Sunday, January 31, 2010

Grafting Queens

As I previously mentioned I'm trying my hand at breeding queens. I'm also aware that the queens in my second apiary are nearing the end of their productive life and I need to replace the queen I sent north, which has arrived and is in good health.

I spoke to the beekeeper I sent the queen and he said they were quite loud when they arrived and to calm them down he wet his finger and let a little water run down the inside of the cage. This calmed them immediately. I hadn't thought about water for them before, but the candy is quite dry. The queen is now in the destination hive so hopefully all is well and the candy has been removed.

Today I grafted 5 grubs into Bozi queen cups. These are plastic cups that make it very easy to transport the queen cells to the nucs or an incubator for hatching. The cups cost about $NZ0.10 each and can be reused. My supplier sells them in bags of 100 so I haven't had to reuse any yet.

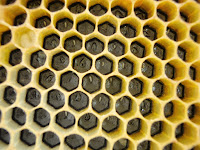
This photo shows the top bar of my grafting frame. The white spot marks position #1.

The Bozi cells are secured to the frame by being pressed onto plastic feet. I bought the feet from a plastics supply company and then used short screws to fix them to the frame. Once the cells are capped a gentle twist will remove it from the frame. This also makes it a lot easier to do the graft as the cup can be held in a comfortable position into the grub is place it in.


I use a 'Chinese' grafting tool because that works for me. There are many other tools that people use ranging from a small paintbrush to a flattened bike spoke or coat hanger. It doesn't really matter as long as you can pick up and release the grub. The chinese grating tool has a flexible tounge which is used to pick the grub up and a push button, much like a Bic pen, on its top that is used to push the grub into the cup.

A well fed, healthy hive is much easier to graft from because there will be a large about of royal jelly in the cells with the grubs. This lubricates the pick up and release process so that it becomes a very smooth action. The grubs on the right side of the bee are well fed are ideal for grafting.

Below are photos of each graft I did. Number 3 looks like a bad one but the others seem fine. It will be interesting to see which ones the bees accept.

12
3

4
5

Saturday, January 30, 2010

Honey, but no brood

I visited my second apiary today but forget to take the camera, which was disappointing because there were a few photos I would have liked to have taken.

Before I even opened hive three I knew I was in for some back breaking work. Just tapping on the hive mat (the ceiling) told be it was well sealed and full of honey. Hive one was the same.

The population in hive three seems to be down and it was completely broodless, which is very odd. They have plenty of honey (or had...) and there was also a reasonable amount of pollen in the brood chamber. Even though most of the space was taken up by honey there were still a few frames with mostly empty cells. The weather has been very mixed but the bees have obviously been getting out as evidenced by the amount of stores they have. I sighted the queen and she looked very healthy and large enough to be laying. I removed a full super of honey, including a couple of fully capped frames from the brood chamber, and filled the gaps with some drawn comb. I'll have to pay them another visit in a few weeks and see if the queen has started laying yet.

Hive one was boiling over with bees. I took a three quarter depth super off them and gave them an empty, but drawn, full depth super. They were also broodless, I didn't sight the queen so it could be that the queen in hive three is failing and the queen in hive one is dead but it seems very coincidental that both queens would stop laying at the same time.

As far as food sources go, I know we have the following natives in the foraging area and they will be flowering now, or have just stopped flowering
There are also hundreds of eucalyptus trees that the land owner has planted for firewood.

I'm wondering if the queens have stopped laying because there has been a sudden drop off in available food. October, November and December are the main flowering times for New Zealand natives and we're now entering  fruiting time, which is not much help to the bees. Both the queens are at the end of their second season so its probably time to replace them anyway.

The supers I took off weigh 39.1Kg (for the full depth) and 27.2Kg for the ¾ depth, which is about right for 10 fully drawn and capped frames. About a third of this weight is the wood and plastic frame and another third for the wax leaving about one third honey. If this estimation is correct I should have about 25-30Kg of honey after extraction.


There is definitely some manuka or eucalyptus honey in this batch. I haven't tasted it yet but the photo on the right shows what I'm used to seeing, very white wax cappings. The photo to the left shows what several of the frames in the ¾ height super look like, very dark and not white at all. There are ridges running along the surface, instead of the mostly smooth surface of 'multi-flora' honey. It will be interesting to compare the flavors once I've extracted it, if I can extract it. Manuka honey is difficult to extract and used to be an unwanted crop, not many years ago, but now, with the discovery of 'active' manuka honey it is a significant earner for some bee keepers.


I've also heard that the queen I sent north has arrived and seems to be in good condition, despite being in the national mail system for the better part of 5 days.

Wednesday, January 27, 2010

Dispatched Queen

Thats dispatched as in shipped, not dispatched as in terminated...

The queen that was maturing in the nuc has grown up big and strong and is laying like only a queen bee can. In a previous post I mentioned I wasn't sure that I'd use her in a hive. My concern was that she was quite small and maybe I had grafted a grub that was older than ideal or that the bees hadn't done a very good job of raising her. The other idea I floated was that maybe she hadn't mated or wasn't yet laying. In the photo on the left you can see that her wings are almost, but not quite, as long as her thorax. The photo to the right shows her two weeks later.


Her thorax extends well past her wings and she looks very golden. There is also plenty of brood (at least one full frame). The brood in the previous photo is brood that hadn't quite hatched when I took the frames out of the parent hive and put them in the nuc.

I posted a question to the bee keepers club website about mailing queens and what the best way to go about it was. I received no response so I packaged her, and her servants, in their cage. Placed the cage in a light bulb box I had floating around and filled the void with some bubble wrap. I wanted to send her in a relatively large box so that there was less chance of her overheating or suffocating.


You can't see much in this photo, but she is in the cage with 5 workers. I made a candy by mixing icing sugar with honey until it as 'dry' and pliable. It has to be quite dry as you don't want the bees wings to stick to it.
On a previous attempt to transfer a queen from one hive to another I used icing sugar and water to make the candy. When I open the hive two weeks later to see how she was going I found her shriveled up and dead still in the cage. I guess the bees didn't recognise the candy as food so didn't remove the plug in the end of the cage.
I left this cage in the hot water cupboard overnight, before mailing it, and were bits of candy under the cage, indicating the bees were chewing on it already so hopefully the host hive will clear the plug this time.

I'm still waiting to hear what condition the queen is in as I don't think she'll arrive at her destination until tomorrow. Here's hoping she's all good....

Sunday, January 17, 2010

DIY Solar Panels

I've been reading around the 'net and found there is a bit of a buzz around building your own solar panels. I've always liked the idea of producing my own electricity and with the amount of solar radiation arriving on our roof everyday it should be quite practical. Only the financial cost has stopped me so far. For a reasonable sized, grid tied, system I’d be looking at well in excess of $NZ10,000.

One possible solution is to make my own photovoltaic panels. I’ve ordered 200 broken solar cells from a seller on e-bay. They cost me $NZ120, with over half that cost being shipping from Miami. I estimate each cell should give me, at worst, about 0.6W which should give me about (0.6 * 180) 108W. I’m using 180 to allow for some unusable cells and some mistakes. This works out at about $1/Watt. Add to that some building materials to bring the cost up to $1.50/Watt which is about 20% of the cost of buying the cheapest professionally made panels and 10% the cost of the more expensive ones. I’m expecting to get better than 108W, but I’ll keep my estimates low so I’m not disappointed.

Of course, my panels won’t come with a 25 year output guarantee, but I’ll take the risk.

After my paypal payment cleared the shipper sent the package, 5 days later it would have been at my door but we were away, camping at Okains Bay. I suppose I’ll have to wait until tomorrow, which is just as well as I’ve got unpacking to do.


Shipment Activity Location Date & Time
--------------------------------------------------------------------------------
Attempted Delivery NEW ZEALAND 01/16/10 1:20pm
Out of Foreign Customs NEW ZEALAND 01/15/10 4:59pm
Arrived Abroad NEW ZEALAND 01/15/10 1:20pm
International Dispatch UNITED STATES 01/12/10 4:44pm
Arrival UNITED STATES 01/12/10 4:43pm
Electronic Shipping POMPANO BEACH FL 33077 01/11/10 1:09am


We use about 8000KWh (kilowatt hours) a year. If we assume that 60% of that is for hot water (4800KWh) and that a solar + gas hot water system would supply all we need that leaves us with 3200KWh. If we put gas in for hot water we would probably cook on that as well, removing our electric stove, but I'm ignoring that for the moment).

3200KWh / 365 (days in a year) is just under 9KWh/day. Assuming 4 hours of usable sun a day that would mean I'd need a 2.25KW solar array to supply our needs.

There are a lot of assumptions in there and factors I'm ignoring (like storage, dark winter weeks, peak loads etc) but that gives a rough indication of the size of array I'd need.

At $1.50/Watt I'd need to spend $3375 on the panels, which is not a lot of money when compared with using professionally built panels. I'm not sure I'll ever get there but there's the target.

Tuesday, January 12, 2010

Varroa Infestation


I've previously treated one of my hives for varroa with Apistan because I found a couple of varroa in the hive after doing a 24 hour survey. It probably wasn't strictly needed but I did it anyway.

I now have a full infestation that will need treating as soon as I have taken my honey supers off. This photo is the result of opening 3 drone cells. There are at least 6 mites in this photo. I had shivers down my spine as I watched one mite climb onto the back of a bee. The bee could obviously feel it as it desperately scratched at its back, trying to knock the mite off. The mite disappear into the gap between the abdomen and thorax. To make matters worse I had heard that a bee having a mite on its back is comparable to a human having a large rat attached to them and sucking their blood. Makes me feel for the bees as they seem to be completely unable to do anything about it and the mites can move very fast. To get an idea of the scale have a look at the photo on the right. The worker bee to the right of the queen has a mite just under her right wing.

Spotting the mites is quite easy. I found, once I knew what I was looking for, that I could pick a mite on the back of a bee, on a frame will of bees, with no problem at all. I suppose that once you 'have your eye in' for what is normal, the abnormallity of the mite sticks out like a sore thumb.

One of the most common techniques is to open a drone cell and have a look for the mites there. The mites prefer drones as they take a few days longer than the workers to mature. These few extra days give the mites a little longer to breed, resulting in one or two extra mites per brood cell.


Many people use a capping scratcher but I've found just busting up the drone cells with my hive tool to be sufficient. A healthy pupae is quite white so the mites are obvious. This drone pupae has two mites clearly visible on it. You can see that I have just removed a patch of drone cells.

Next month, as funds allow, I plan to buy some drone frames and use the technique described in this study (and this one) to see if I can knock the mite population back to a managable level. I suspect I'll still have to resort to Apistan, or something similar, to ensure the colonies health throughout winter.

The most encouraging part of this study is stated in the abstract.
"These data demonstrate that drone brood removal can
serve as a valuable component in an integrated pest management program for V. destructor and may
reduce the need for other treatments on a colony-by-colony basis."

Sunday, January 10, 2010

Queen Bee Health

As mentioned previously I'm trying my hand at queen rearing so I'm interested in what a healthly queen looks like and her behaviour. The queen bee is an egg laying machine. All members of the colony are her children so the temperament of the hive is very significantly affected by the queens health.

These two photos show queens from separate colonies. The larger one, on the left, is the queen from my hive. The smaller once, on the right, is a queen I grafted and is currently being raised in a nuc. She is not laying yet, which may explain why she is smaller. I'll take another photo of her before I send her away to see if she is any bigger.

These two queens are mother and daughter. The mother, on the left, has a much longer abdomen than her daughter. This may be to do with the age of the grub I grafted, the hive conditions when the bees were growing here or just the fact that show is not laying yet.

Both queens have clean, golden bodies. I believe this can indicate their age, they darken as they grow older. If you look closely at the mother (left) you'll notice she is missing a wing. I'm not sure when she lost this but it was obviously after her mating flight as she is laying well. You might also have noticed the varroa mite on the body of the bee directly to the right of the daughter queen.


Laying pattern and habits can also tell you a lot about the health of the queen. This photo shows brood as various stages of development. The white, rice shaped objects, are eggs. They will stay like this for 3 days before hatching into grubs. The grubs are the wet spots at the bottom of the cells. These grubs will grow until they are ready to be capped, like the grub at the top right of the photo.
This queen is laying well as every cell has an egg. Older, failing queens and drone layers often lay multiple eggs in one cell.


There are many signs of queen and colony health, these are a couple I saw on my last inspection.

My Apiary

As I live on a 400 square meter section, including a 90 square meter house, there isn't a huge amount of space. The bees don't seem to mind being squished in on one side of garden so no problem.


I currently have one hive and two nucs at home and another two hives further out of town. The first photo shows the setup with the screen to force the bees above head height so they don't bother us in the garden . The second photo shows the small, 4 frame, nuc box I built to house a queen. I'm trying my hand at queen rearing so this is the first of many, hopefully. Under the nuc box is a small hive I am populating for a friend. He wants to grow blueberries and use bees to pollinate them so I'm helping him learn about bees.

Hive Two Inspection

Goals:

  1. Inspect for varroa
    I know I have varroa but I still have honey supers on so can't treat yet. I want to get an idea of how bad the infestation is to determine whether I need to treat now or can wait another month.
  2. Remove Pollen collector
    The bees have given me 2.5kg of saleable pollen this season. There is also approximately 1kg of the smaller grained pollen which is not saleable. I will use this as feed for nucs and my hives at the beginning of next season.

    The pollen collection restricts the flow of bees a quite a lot and the volume of available pollen has significantly reduced now so I'll remove it until next season.
  3. General clean
    Its been a few months since I've stripped the hive completely down so I'm expecting to find a lot of rouge comb and lumps of propolis that shouldn't be there. Also, there will be a reasonable quantity of dross under the pollen collector which will encourage pests (like the wax moth) to take up residence in the hive. This needs to be removed.
  4. Rearrange honey frames to get bees to complete capping.
    Currently there is 1 full depth and 1 ¾ depth honey super on the hive. The full depth is getting close to being ready for extraction so I'll rearrnge the frames so that bees cap the frames off. The bees tend to work on the frames in the middle first so I'll place the least complete ones there. Once they are capped they can be moved to the edge of the hive and replaced with the almost complete frames.